Give yourself a local domain name
Sometimes, the good ol' http://localhost web address isn't enough for local development. In fact, if you are hosting or developing multiple sites, a single web site can be down right limiting.
Windows 7 lets you create multiple web sites which alleviates this and lets you create sites for specific projects. A further extension of this is to apply host headers to your local machine sites and then you can reference them however you like.
You can find your hosts file (on a windows machine) in c:windowsSystem32driversetc. It's in a protected location on your computer, so you will need to open it with higher priveleges. To do this, find the file in the above location and right-click on it. Select "Run as Administrator" from that menu.
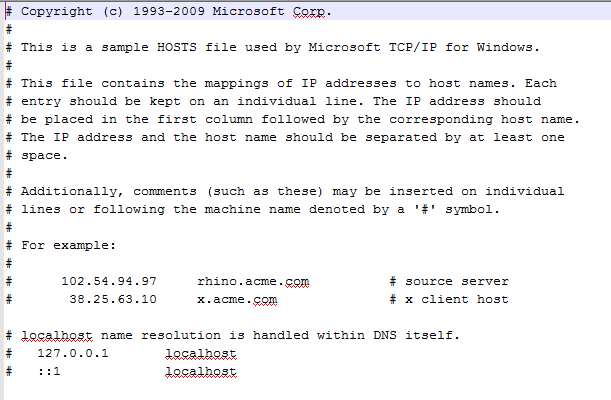 Now it's a special windows file and has no file extension (like .doc for Word document) so you will need to tell your machine which program to view the file in. My suggestion is your favourite text editor like Notepad or Wordpad. Open the file and you'll see host names that are already configured for your computer. Notice there is one already there for localhost - looks familiar right. Even though localhost isn't handled in the hosts file, it gives an indication of what we are trying to achieve. The top section of the hosts file (everything line that begins with a #) is just comments and does not affect how the file functions. So what we want to do is create another line beneath the comments. There is a convention for how you enter this information so be careful.
Let's say we want to create a new host record called projects.dev. Once finished, we will be able to browse this site using http://projects.dev. Then follow these steps:
- Create a new line
- Type the IP address (127.0.0.1 - this is called a loopback address and it's how your computer references itself - techy stuff)
- Press tab twice
- Type your desired host name (projects.dev)
- Save and close the file
Now if you go to Internet Information Services (IIS), you can apply this host name to your web sites. If the website already exists, follow these steps:
- Select the web site in the left-hand pane of IIS
- Click "Bindings" in the right-hand "Actions" menu. A dialog box will appears with probably only one item in it. If there are more, select the site you want
- Click Edit
- Type your new host name in the "Host name" field.
- Click OK
- Click Close
If you are creating a new website, the steps are a little easier:
- Right-click "Sites" in the left-hand pane of IIS and click "Add Web Site"
- Fill in the details. I usually set the "Site Name" to the host name. In the "Bindings" section, add your new host name but there is no need to change the IP Address or port, etc
- Click OK
And there you have it. You can open your browser and type "http://projects.dev" in the address bar and your site will be running.
There is a chance that you permissions may be a problem, but that it outside the scope of this article. You know where your website files are, so you will need to make sure you website permissions are set for the identity of the Application Pool used for your site.
Til next time ...